When dealing with a client that has Excel 2010, 2013 or 2016, the Sensdat team builds and formats the cockpit using a very familiar program, Excel, using Pivot Tables, slicers, hyperlinks and conditional formatting. The following process will help you save a lot of time and repetitive tasks while creating an awesome cockpit that will make all of your colleagues admire your skills! 🙂
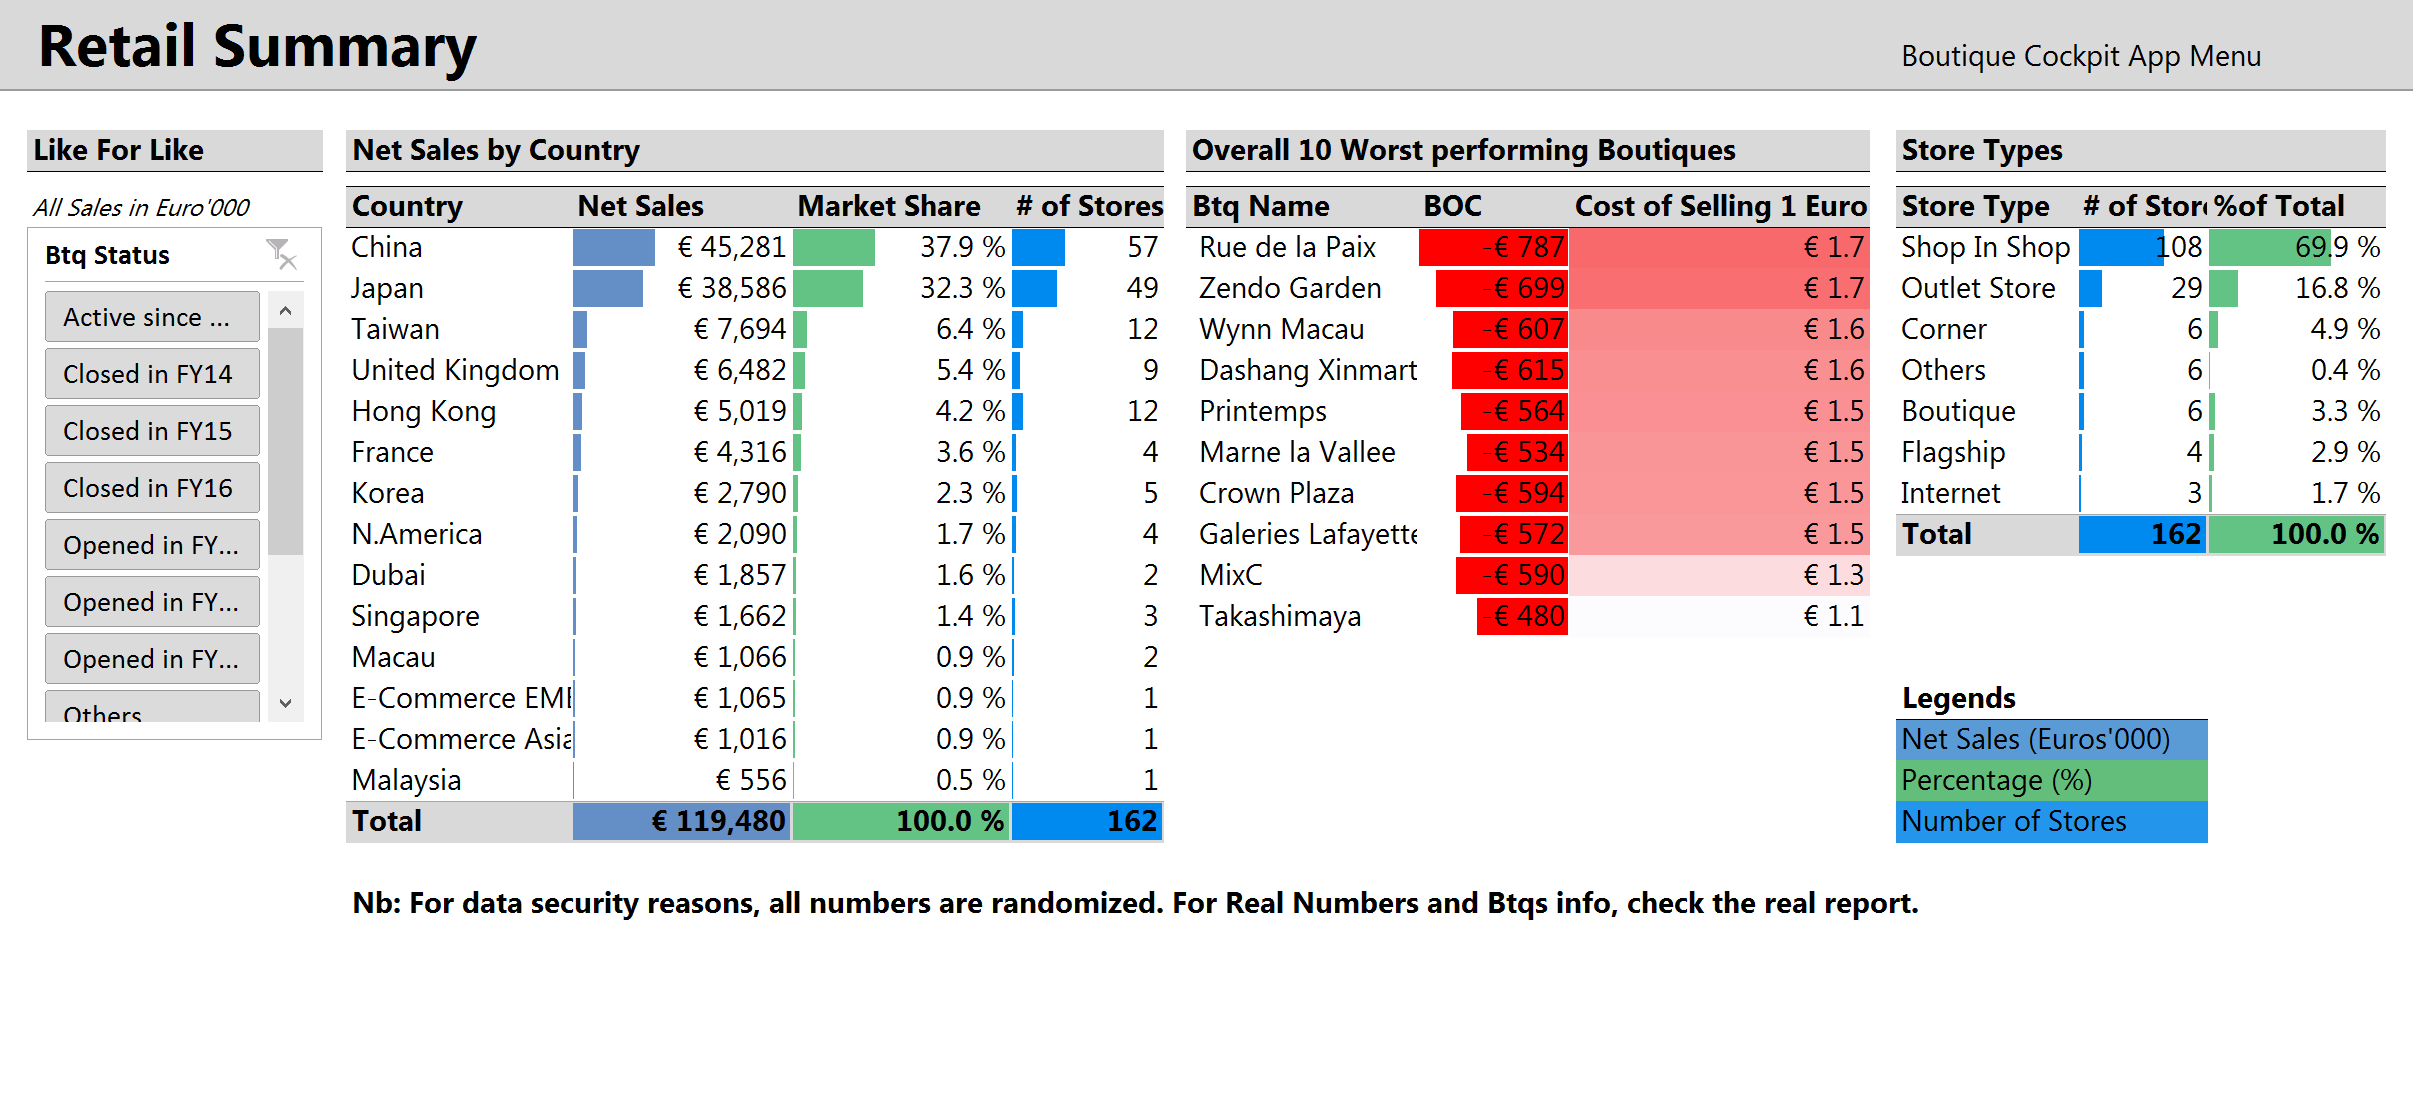
Note: How sexy is that for an Excel spreadsheet? 🙂
The process of building a sexy dashboard will be split into 3 to 4 different blog posts (Tabs Formatting, Pivot Tables & Charts, Slicers, and Cube Formulas) to keep each post short. If you follow the process step by step you will become a STAR in your department as most of the people are highly influenced by what they see: visuals. If you are interested into knowing more about the “technical stuff” behind the dashboards and want to become the “Alien of your department” (Aliens a much rarer than stars…), check out the posts written by our techies. Now, let’s start with the first part:
Tabs formatting
“Design as much as you can the cockpit template before adding any content (pivot tables and slicers, which we will build in part 2).”
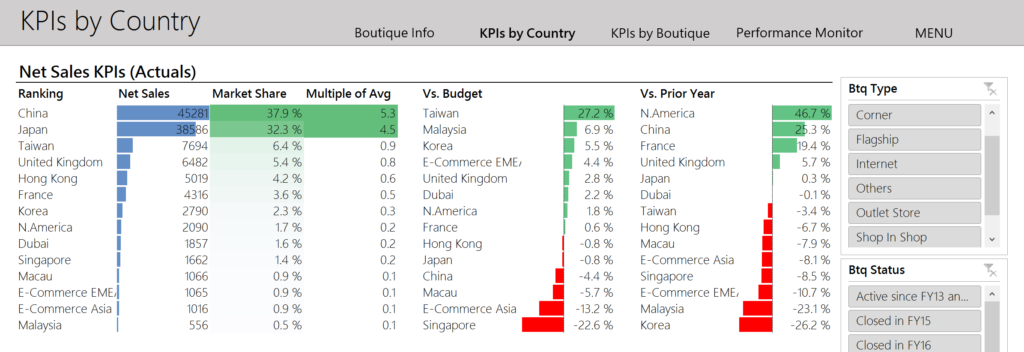
Bear this in mind during the entire dashboard building. This will help you just copy and paste the worksheet for all the tabs of your cockpit before creating the specific pivot tables, slicers and conditional formatting. For example, to have each tab of your final cockpit look like this:
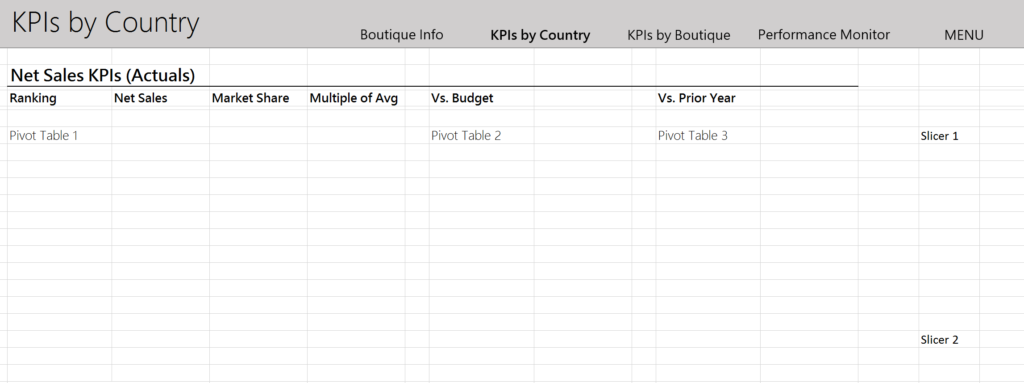
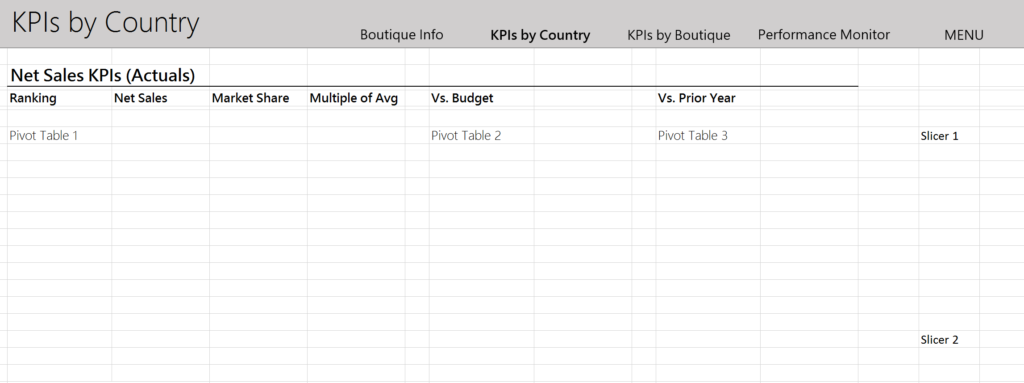
then, you should define the first tab format like this:
So…let’s do it, together of course!
Steps to follow (in this order)
- Insert the title of the tab in cell B1 (for design reasons, A column is left empty and thinner)
- Freeze the top row (this will help to keep the first row info of the tab even when you scroll down)
- Create boxes or shapes with text inside that are going to be links to other tabs (e.g. Btq info, Back to Menu, …) and place them on the first (frozen!) row. Design those boxes straight away (style, size, color, text and font of the text)! For the font style, we like to use “Microsoft New Thai Lue”.
- Design the rest of the page by inserting text (i.e. name of the charts/pivot tables that you are going to build) and lines (to separate different sections). Tip: keep it simple and “light” (too many lines and stuff are not esthetical J ). All what you see written in black and bold on rows 3 and 4 (Net Sales KPIs, Ranking, Net Sales, etc…) is what we mean by this point 4).
- Press “ctrl a” and apply the font “Microsoft New Thai Lue” to the entire page (nb: it should be the same font as the boxes on the top frozen row but the size may differ. Do the check.)
- Name your tab (in this example it could be “KPIs By Country”).
- Now that your entire tab is pretty, you can copy it as many times as the number of tabs that your cockpit will have. Remember: we do this before creating any content (pivot tables). You will soon understand why.
To copy a tab, right click on the name (of the tab) you just wrote under 6) and click on “Move or Copy”. Then select the place (in the workbook) where you want to copy it and tick the box “create a copy” before clicking “Ok”.
Creating copies of your tab will help you in 2 ways:
- You do not have to reformat anything on any new tab… (it is done, you just have for example to replace “Country” by “City” in the title and as the name of the tab and you are done)
- Later when the cockpit will be interactive (with hyperlinks), when going from one tab to another you will face the exact same structure (the difference being only the content). If you reformat each tab or if you change something to one tab after you copied it then you are going to have an esthetical change in the format when you click on hyperlinks to navigate from one tab to another and (believe me!) you are going to get frustrated (and so may be the user). Maybe you need to do this mistake to understand… (so ask a colleague/friend if you do not get it right now).
At the end of these 7 steps, you should have a cockpit with a few tabs that all look the same (except the tab names and titles that you just changed). The next step is inserting and formatting the pivot tables.
Now that each tab is created, you will make the text “bold” in the text box on the specific tab you are on, and this for each tab! Look at the picture below. We are on the “KPIs by country” tab. How do we know it? Because the selected tab’s text (in the box) is bold. How do we do this? For each tab, select the text box in which the text represents the tab you are and change the font to “bold”. This is to help the user to identify quickly on which tab she is.
This is what each of your tabs may look like right now:
Once you have built your different tabs, the last step before filling them with info (pivot tables) is to link them. This is made using “hyperlinks”. It is pretty straightforward. Let’s take an example: on the above cockpit, we want to be able to access to the “Btq Info” tab by clicking on the box “Btq Info”. To do this, we do a right click on the “Btq Info” box and click on “hyperlinks”. Then, select “place in this document” under “link to:” and select the name of the sheet where the “Btq Info” is. If you are well organized… the name of this specific sheet is…”Btq Info” or “P&L”. Click “Ok”. You have now a link from your “KPIs by Country” tab to your “Btq Info” tab via the “Btq Info” box. Do the check yourself. Now you will have to do the same process for all boxes across all pages. Be super careful while doing this because a mistake is easily made, so do not forget to check out all the links once you linked all the tabs (sheet) together.
Nb: the only button where you will have no hyperlinks are those that contain a “bold” font because they indicate the page on which you currently are.
Your “cockpit template” should now be ready. It is time to add some content!
Check out our next post “Building a beautiful non-Excel-looking Dashboard using…Excel: the process (part 2)”
Kevin
Kevin Follonier is a swiss Co-Founder and CEO of Sensdat, a data analytics consutling company helping people make sense of their data.



Recent Comments